

Android 7.0 Nougat Virtual Machine on VMware
Virtual machines are kinda fun, give relief from a troublesome experience to dual-boot Operating Systems.Today I am going to show you how to create a virtual machine in VMware & how to install android nougat (7.0) virtual machine on VMware in Windows 10. Android nougat 7.0 is the latest Open source version available developed by Google.
You will need a couple of things to get started.
-
VMware
- Android x86: Download android ISO whichever version you want to grab it here.Android-x86 is a project to port Android open source project to the x86 platform.The Android-x86 team created their own code base to provide support on different x86 platforms and set up a git server to host it. it is an open source project licensed under Apache Public License 2.0.
Using Andriod 7.1 Nougat-x86
We will use Android nougat for this purpose reason for using android nougat 7.1 as virtual is its the latest open source version available with latest features but you can apply all steps to previous versions.
Before installing VMware
Make sure virtualization is enabled in your PC’s BIOS. Otherwise, this will not work.Once you have those things, you’re ready to get started.
Steps to run Android OS virtually on Windows 10
- Install Vmware
- Creating Virtual machine in VMware
- Installing Android nougat Virtual Machine in VMware
Recommended: Best Root Apps For Android Phones And Tablets
Installing VMware in windows 10
Users who don’t know about VMware it is like a media player but instead of videos and audios, it runs Different Operating systems Virtually on your Windows/Linx.
- The first step is so simple, just go through normal steps next, next and installation directory.
- At last, run VMware as Administrator.
How to Create Android Virtual Machine in VMware Windows 10
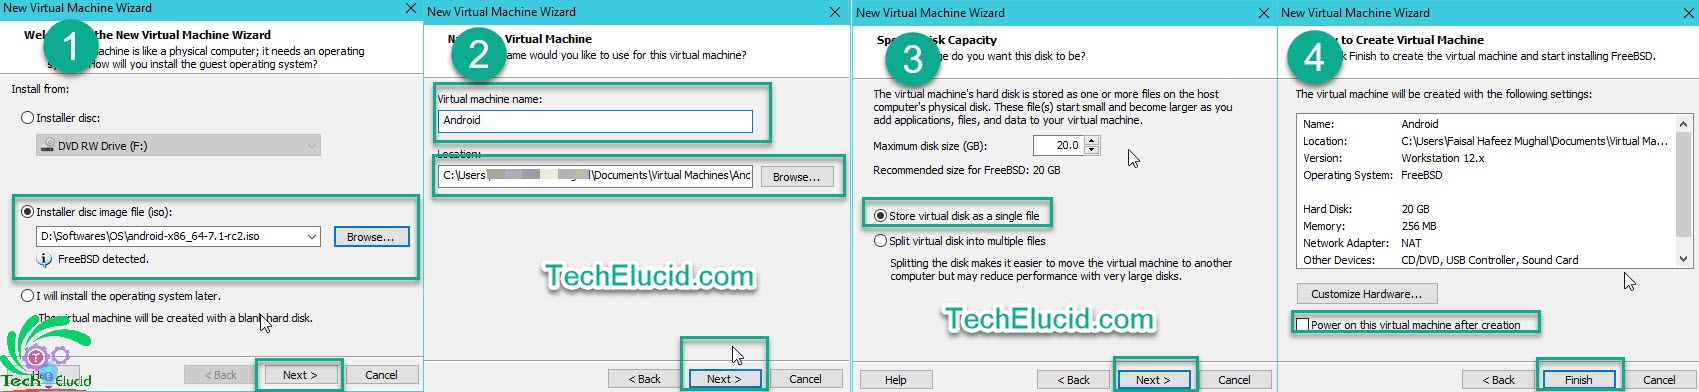
Follow these steps to create a virtual machine using a virtual disk.
- Start VMware Workstation by double-clicking the VMware icon on your desktop or use the Start menu.
- Click Create a New Virtual Machine in the main window or press CTRL+N.
- Select ISO method and browse Androidx86 ISO file.
- VMware will get machine type, in our case, it is FreeBSD then Click Next.
- Setup Virtual Machine Name and the location of the virtual machine’s files then click Next.
- Set the maximum size of the virtual machine’s hard disk.
- Select Store virtual hard disk as a single file, click Next.
- At last click finish.
- Your android virtual machine is created successfully.
How to Install Android Virtual Machine in VMware Windows 10
- Open Vmware and start Android virtual machine you have created.
- Once the OS starts to load, scroll down to “Install ” and press enter.
- Select Create / modify partitions.
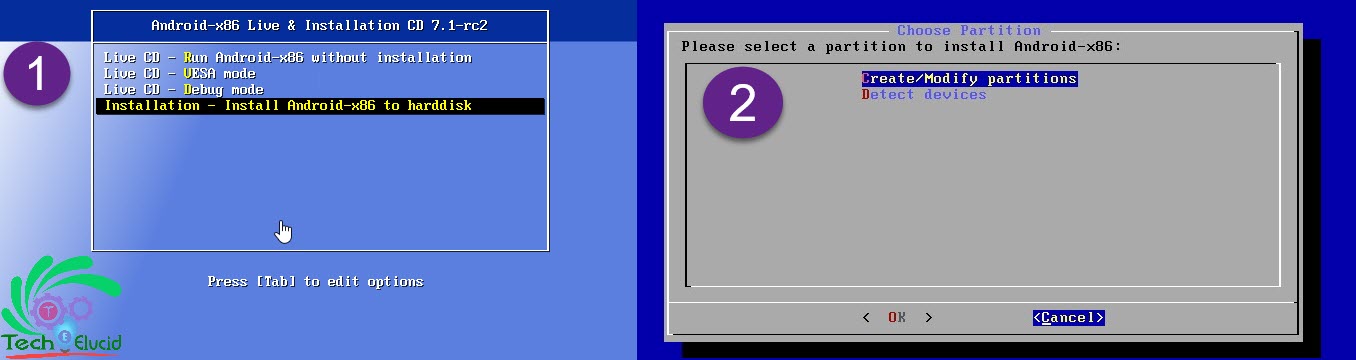
Create or Modify partitions in Android Virtual machine Installation
- When it asks for GPT Partition, select “No” and hit enter.
- Then create a new, primary partition.On the disk utility screen, select “New” and give default size for partition.
- Hit Enter on the “Bootable” option to make the partition bootable, then choose “Write.” Tap Enter.
- The type “yes” for verification and write down the changes.
- Once it’s finished, highlight the Quit option and tap Enter.

- Then select this newly created partition to install Android OS.
- Chose EXT3 as a filesystem.
- Now everything is done, just confirm the changes (YES to all).
- Then you’ll be prompted to screen showing you to run Android or reboot. Now It is up to you can go either way.
See Also: Top 3 Apps To Watch Movies On Android Phone
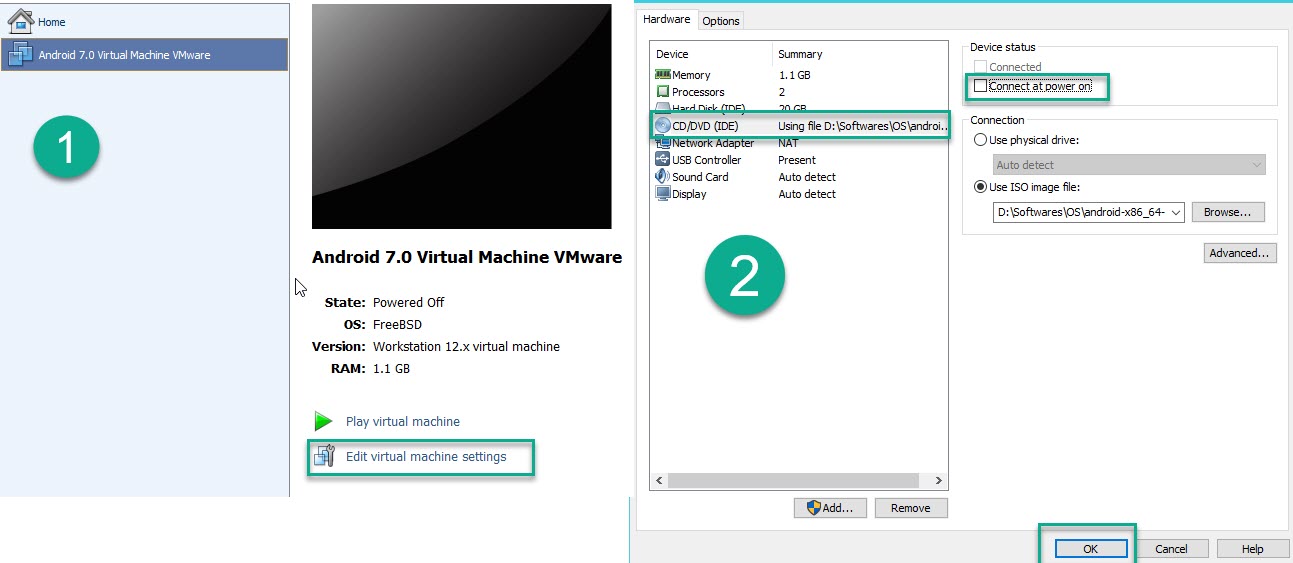
Disconnect ISO file after Installation
Disconnect the ISO file before the next reboot otherwise you’ll start over with Android installation screen.
- To disconnect ISO file goto “Edit Machine settings” in the newly created Virtual machine.
- In Hardware Tab Select CD/DVD(IDE) then uncheck Connect at power on & click OK.
Let us know if there is any mistake we will appreciate your thoughts and suggestions.If you had any problem during the installation feel free to write in the comments section below or message us at social accounts.


Well done
Great article